
This plug-in copies the dynamics (changes in volume level) from a source track and applies it to the audio in the destination track. The source and destination tracks must both be selected, but if only one track is selected then that track is treated as both the “source” of the dynamic envelope and the “destination” where it will be applied.
Controls:
- Follow peak or RMS level: choice [Peak / RMS] default=peak
Chose to follow peak level or RMS level. - Follow first track as: choice [Mirror / Inverse (ducking)] default=Mirror
Choose to “mirror” highs and lows from a track to another, or
apply the inverted dynamics (loud parts of the source track reduce the level of the target track, and vice verse) - Time resolution: slider [0.01 to 10.0] default=0.5
The time resolution for copying the dynamic envelope.
Smaller values follow the dynamics more closely, but may cause peculiar modulation effects if too small. - Control range min: slider [0 to 1] default=0
The lowest level in the “source” track to be considered, Any sound below this level is treated as silence. - Control range max: slider [0 to 1] default=1
The highest level in the “source” track to be considered, Any sound above this level is treated as 0 dB (full volume).
Basic Usage
“Mirror” mode:
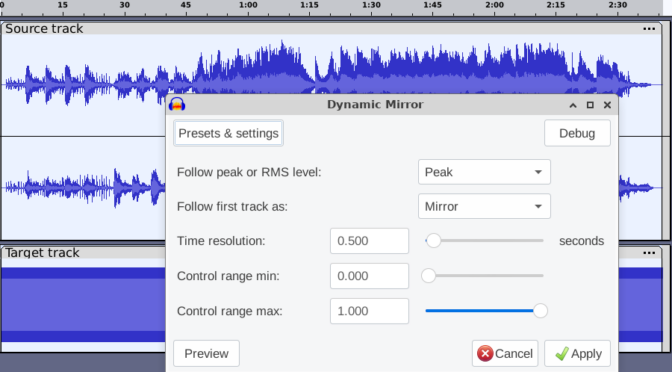
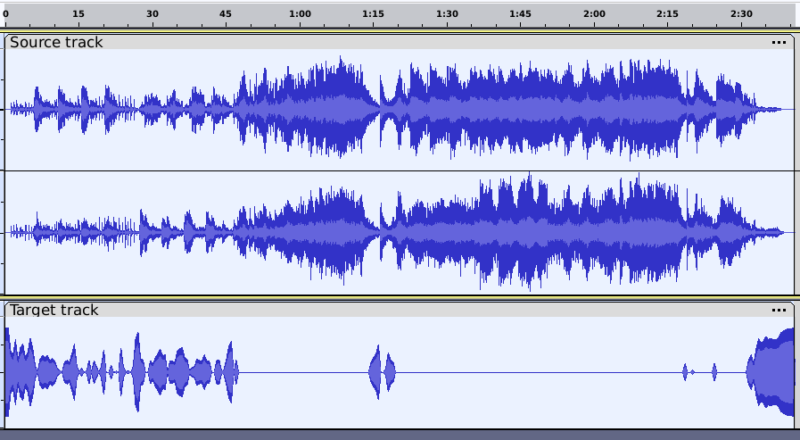
Here we have two tracks selected. Tracks may be mono or stereo. If the source track is stereo, then the dynamic envelope is calculated from the average amplitude of both left and right channels. If the target track is stereo, the same envelope is applied to both left and right channels of the target track.
In this example, the envelope is created by tracking the peak level in the (upper) source track (the dark blue area of the waveform. If “RMS” was selected in the first control, the envelope would track the RMS level in the source track (the lighter blue region of the waveform).
The second control is set to “Mirror” mode, which tells the effect that we want the target track dynamics to follow the source track.
The “Time resolution” is set to 0.5 seconds (default), which means that the peak amplitude will be sampled every half second.
The control range is from 0 (minimum) to 1 (maximum), so the full dynamic range of the source is considered.
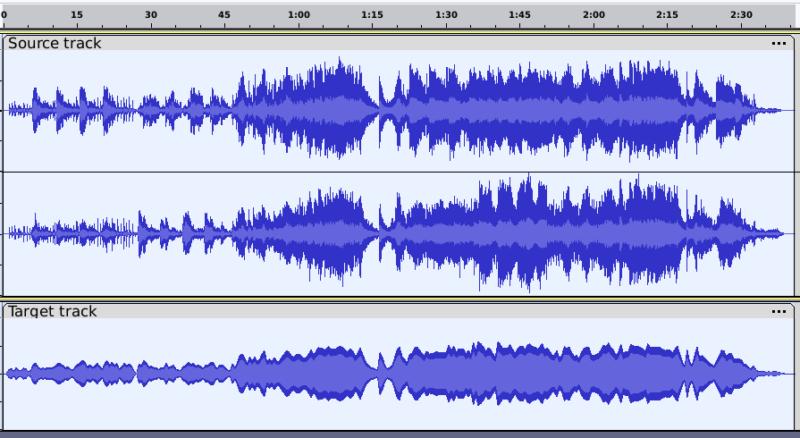
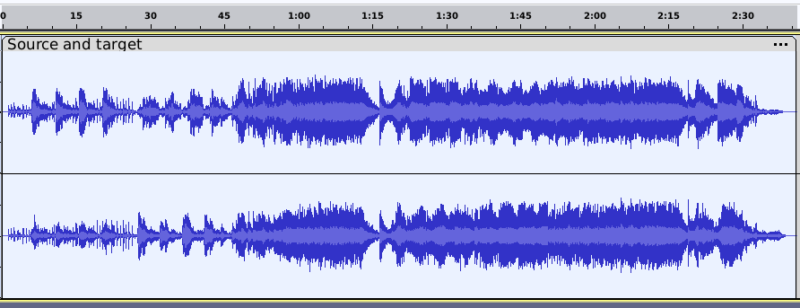
When the effect has been applied, we can see that dynamics in the target track mirror the dynamics of the source track.
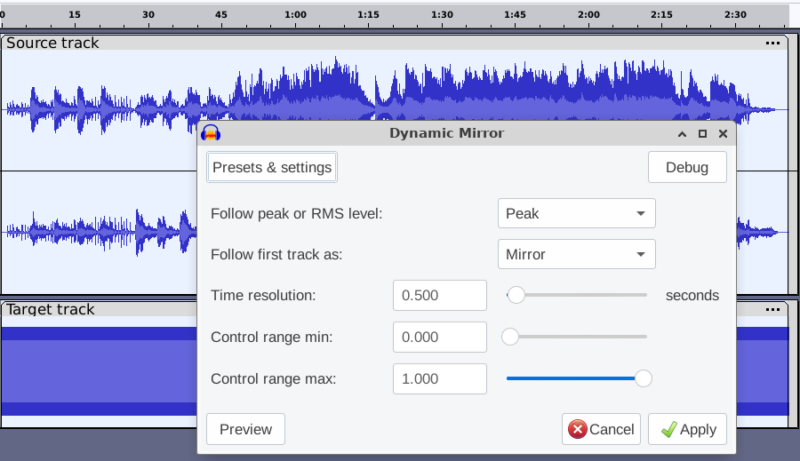
Inverse (ducking) mode:
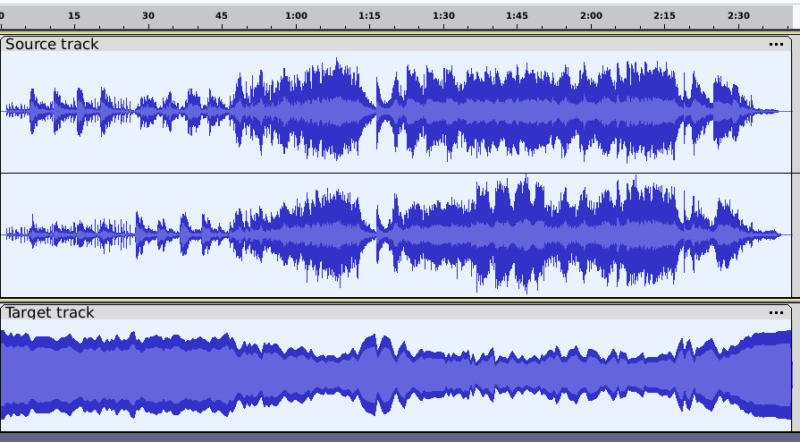
If we had selected the “Inverse (ducking)” mode instead of “Mirror”, then we can see that loud parts in the source track cause the target track level to be reduced. The dynamics of the target track are the inverse of the dynamics of the source track.
If we want to mute the target track when the source track exceeds a specified level, we can accomplish this by reducing the “Control range max”:
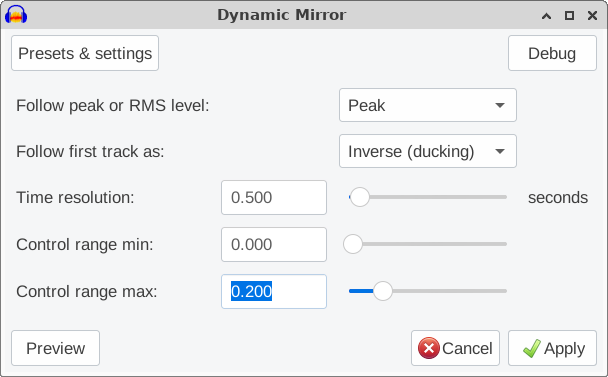
With the “Control range max” reduced to 0.2, the effect only considers sound levels in the range 0 (minimum) to 0.2 (maximum) in the source track. Any part of the source track that is above 0.2 (linear scale) is considered to be “maximum loudness”.
In this particular case, since we are applying the Inverse envelope, regions in the source track above 0.2 peak amplitude will cause the corresponding region in the target track to be silenced:
Applying the envelope to the same track
Compressing the dynamics
As we saw above, when in “Inverse (ducking)” mode, loud parts in the source cause the target track to be attenuated, If we select only one track and apply this effect, then the reduced amplitude of the peaks gives us a form of dynamic compression. Let’s see this in action:
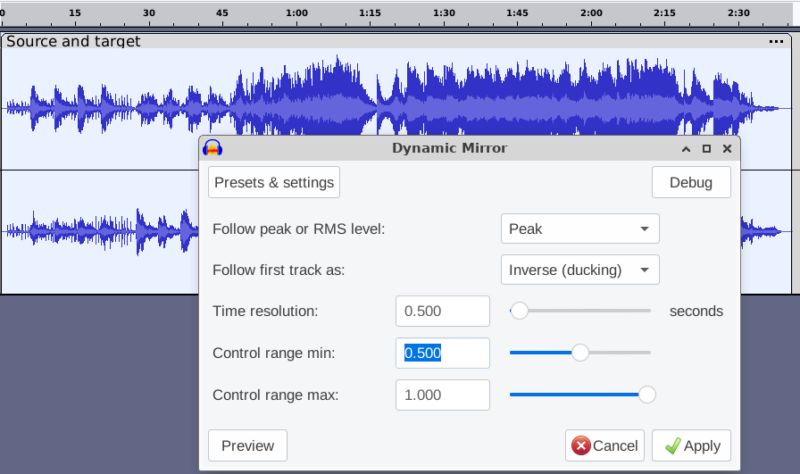
Here we see that the minimum control range has been increased to 0.5 (half the track height), and we are applying the “Inverse” envelope to the selected track. This will cause regions that have a peak level above 0.5 to be attenuated, thus compressing the dynamics:
Applying the mirror to another music track
In the above examples, we have been applying the envelope of a music track to a steady tone. If on the other hand we want to apply the orginal dynamics of one music track to another, the dynamics of the “target track” will influence the final dynamics of the target track. We can minimise this effect by heavily compressing the target track before we apply the Dynamic Mirror.
Other tips:
- By using a “High pass” filtered copy of a track as the “source” track, we can use “Inverse” mode to act as a “de-esser” on the target track.
- For radio style ducking, the gain changes need to be relatively slow, so we should use a “resolution” of 0.5 seconds or more.
- By expanding the dynamics of low level sound, we can (partially) reduce excessive reverberation (animation below, thanks to Trebor on the Audacity forum).
Download
And finally, for your enjoyment, the plug-in itself. This plug-in should be compatible with any version of Audacity 2.x, or Audacity 3.x (tested up to version 3.5.1 alpha.